One of the projects I tackled over the last few months was the big blank wall in my guest room. This room is decorated in black and white and includes my (embarrassingly) extensive collection of Scottish Terrier figurines.


The bed in this room is my old twin bed from growing up. When I had it, it was white with brass, but it was painted black when it was passed down to my brothers. Now it goes perfectly with the style and decor of this room.
The only problem was this big, blank wall. First of all, the twin bed is off-center. That means that I can't really hang one large item over the bed or else the whole room will look lopsided. So I decided to use a recent design trend and create an empty frame wall.


Of course, I got ahead of myself and put them on the wall before I painted them all... I couldn't wait to see the layout! So the rest of the pictures show them in their original colors.
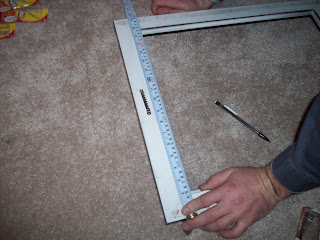
To start, I used a tip I saw somewhere online (probably from the Queen Martha Stewart or someone) and used a huge piece of white craft paper to lay out the design I liked. I simply measured my space on the wall, cut a matching piece of paper, spread the paper on the floor and laid out the frames how I would like to see them on the wall.
 After they were laid out the way I like them, I traced them on to the paper. I was then left with these outlines:
Can you see them? I should have done them in marker so you could see them! But you get the idea...
After having my Handy Man put some frame holders on the back (he's way better at measuring than me!) I was ready to hang them on the wall.
 Is this angle better? I really should have used markers!
  After you measure the picture hangers and figure out where the nail holes go, just nail them right over the paper. Then hang the frames to make sure they lay directly over your original outline.
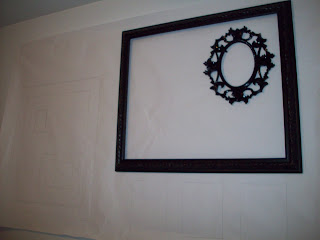 Once all your nail holes are done, you can remove the paper and put all the frames in place. Here is what my wall looked like halfway through, before I painted all the frames and added a few more.
 Here it is now. I still consider it a work in progress, as I can keep adding frames to fill the whole wall if I want. I really like adding the few little touches to the frames to make them more interesting.
I especially like the book I hung with a plate hanger. Super easy and a great way to display a collectible book! This would be so cute in a kids room!
So now the black and white room is a little more complete. Take that off the list! (or at least mark it "half done")


No comments:
Post a Comment