I wanted to do a full week of organization posts starting next Monday, but what a coincidence- it's Organization Week over at The CSI Project this week and I want to link up!
So I'm going to start posting now and even though it won't be a clean Monday-Friday week, you'll still get all the ideas and organization suggestions in a timely manner. Deal? Ok, good.
Organization #1: Attacking Counter Clutter!!
My first organization idea was inspired by my friend, Debbie. She uses old townhouse mailboxes in her kitchen to keep her husband and kids stuff all in one place. As she finds things around the house that belong to someone else, she simply puts them in their respective mailbox to keep them off the counter and out of sight. Here are her mailboxes (
super cute, right?):
Well I looked and looked for affordable townhouse mailboxes but just couldn't find ones that fit what I wanted. I wanted a little more streamlined/simple look than Debbie had, and I wanted to spend less money. So instead of nice townhouse mailboxes, I bought some clear plastic magazine holders from the Container Store that look like this:

They were $9.99 for 2, so they fit perfectly in to my budget. The only problem is- they are boring. So now we add some personalization! I had a vision of each person's initial on the mailbox in custom color/patterns. Brilliant and clean.
Since I am the last crafter on the planet to get a Silhouette Machine, I wasn't able to just print out vinyl letters and call it a day. Instead, I had to do it the old fashioned way: stencils and paint.
We each placed our stencil on the mailbox:

Then sponge painted our first color using crumpled up newspaper:

After the first layer dried, we sponged on a second contrasting color:

Finally after the paint was completely dry, I outlined each letter with a Sharpie to give it a nice clean edge:


And that's it! Easy and done.
Now I have them hanging at the garage door so that we can easily separate mail before it hits the counter. (
Ignore the "Dad" one... he did his before he heard the instructions. Jeez...)


In addition to mail, I also put little goodies I find around the house in there for the kids to put away (chapstick, flashcards, mini motorcycle toys, etc). It's been a great way to keep everyone's things neat and organized and it keeps clutter off my counters (which I am SO thankful for!) The only downfall is that they are semi-transparent, so clutter isn't completely gone. But that's OK with me- it just reminds me of bills to pay or things to follow up on.

We even painted on the dog's initials on their food bins so they would feel included in the craftiness!

Hopefully this helps you come up with a great way to organize your own counter clutter!
I'm linking up to The CSI Project!

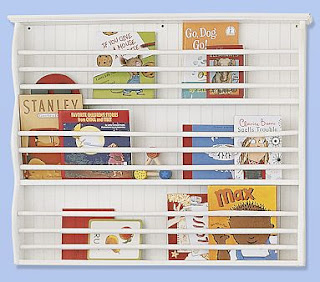 and the DIY version at Infarrantly Creative:
 I lined up four of them in a row and filled them with books:
 I love the way it looks and it keeps all the books at an arms reach at bedtime. I think it's the perfect space-saving solution for this room. Next up, I need to finish hanging a few more things on the wall above the books and this room will be DONE! (for now!)


