Thursday, June 16, 2011

Gourmet on the Go

Do you ever wake up and wish you had a Starbucks in the kitchen? Someone waiting there for you with a scone and an iced coffee? Well I do.

But now, thanks to these amazing premade scones, I can have it all!
My friend bought them for me at Central Market and she said they have blueberry and cinnamon. They are just like Pillsbury biscuits that you open, plop on a baking sheet, pop in the oven, and BAM! they're done before you blow dry your hair!

Pair that up with a flavored coffee poured over ice, and I feel like I just went through the drive thru in my kitchen!
Cheers to a good start!

Tuesday, June 14, 2011

Lamp Re-Do

My favorite lamp had an accident. It wasn't his fault, but his shade just couldn't take the pressure (or the gravity) and it fell free from the frame. Poor shade.

Look how sad it looks:
Pitiful. The top frame is what secures the shade to the lamp itself, so without it attached to the shade, there is just no hope. Of course the sane person would just buy a new shade. They're cheap, right?

But not this girl. Mostly because I couldn't find one in the shape I liked, but also because I just love a crafting challenge! I was inspired by this post at Young House Love and decided to go for it and recover the lamp shade. I found a piece of the perfect brown fabric in the remnants basket at Jo Anne, and we were all set to get going...

So I started with the frame and reconnected it to the shade.

I simply used masking tape because I didn't have to worry about it being too strong. I was going to hot glue the fabric over it and that would hold it together just fine.
After several strips of tape around the top, the frame was securely re-attached. (I feel I should mention here that this lamp is purely decorative. I never actually use it because my bedroom has plenty of overhead light from my ceiling fan. Additionally, the fabric I chose is fairly dark, so this strategy may not be perfect if there was light actually shining through the shade. The tape may or may not create shadows, depending on your fabric choice)
After I secured the frame to the shade, I began attaching my fabric. I started by running a line of hot glue down the seam on the shade, and placed the fabric on it quickly and smoothly.
Once the fabric was attached at the seam, I pulled it taught all the way around and hot glued along the top edge first. My problem was that this shade was not perfectly tubular. It was slightly angled, so the fabric wouldn't lay tight and smooth. I had to slightly pucker/pleat the fabric along the way. As you can see, by the time I made it all the way around, the layers weren't lining up perfectly anymore. It's OK in this situation because there is no pattern, but if you are working with a pattern you'll want to be more careful.

After it was laid out all around, I secured the inside frame edges with another line of hot glue.
(I should preface here, that this project would have been MUCH easier if I would have had Handy Man help me hold the fabric in place. But I was too excited to get it done and didn't want to wait for him!)
After it was glued down I trimmed the excess around the edges. The fabric I used was not ideal, as it frayed a bit when you cut it. So I left a larger edge than normal, in case it starts to fray.
Again, since this is a decorative lamp, and not exactly a functional light source, the inside seams don't have to be perfect. But I'm sure I could have done a better job trimming it than this:
Ideally I would clean it up and/or add a finished strip along the inside of the shade, but I didn't want to take the time. It looks fine from a distance, and that's all that matters for a fake-on-the-dresser-just-because-it-looks-good lamp. Check it:
I think it works well! And it didn't take long at all. Those are the kinds of projects I can get behind!

Empty Frame Gallery Wall

One of the projects I tackled over the last few months was the big blank wall in my guest room. This room is decorated in black and white and includes my (embarrassingly) extensive collection of Scottish Terrier figurines.

The bed in this room is my old twin bed from growing up. When I had it, it was white with brass, but it was painted black when it was passed down to my brothers. Now it goes perfectly with the style and decor of this room.

The only problem was this big, blank wall. First of all, the twin bed is off-center. That means that I can't really hang one large item over the bed or else the whole room will look lopsided. So I decided to use a recent design trend and create an empty frame wall.

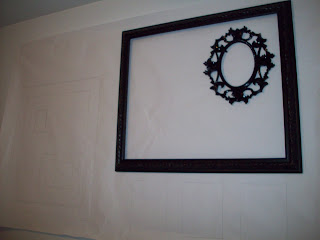
So I started with this blank canvas and a variety of frames. I have been collecting assorted frames from thrift stores and the Hobby Lobby clearance section for a while. They were all different colors, so I gave them a quick coat of black paint, and "Ta Da"- they match!

Of course, I got ahead of myself and put them on the wall before I painted them all... I couldn't wait to see the layout! So the rest of the pictures show them in their original colors.

To start, I used a tip I saw somewhere online (probably from the Queen Martha Stewart or someone) and used a huge piece of white craft paper to lay out the design I liked. I simply measured my space on the wall, cut a matching piece of paper, spread the paper on the floor and laid out the frames how I would like to see them on the wall.
After they were laid out the way I like them, I traced them on to the paper. I was then left with these outlines:
Can you see them? I should have done them in marker so you could see them! But you get the idea...

After having my Handy Man put some frame holders on the back (he's way better at measuring than me!) I was ready to hang them on the wall.

I simply hung the paper on the wall using thumb tacks, and used the outlines as my guideline for where to put the nails for each picture hanger.
Is this angle better? I really should have used markers!

After you measure the picture hangers and figure out where the nail holes go, just nail them right over the paper. Then hang the frames to make sure they lay directly over your original outline.
Once all your nail holes are done, you can remove the paper and put all the frames in place. Here is what my wall looked like halfway through, before I painted all the frames and added a few more.
Here it is now. I still consider it a work in progress, as I can keep adding frames to fill the whole wall if I want. I really like adding the few little touches to the frames to make them more interesting.
I especially like the book I hung with a plate hanger. Super easy and a great way to display a collectible book! This would be so cute in a kids room!

So now the black and white room is a little more complete. Take that off the list! (or at least mark it "half done")

Friday, May 27, 2011

FUNK

You read that right: I said FUNK. That's what I'm in today.

I thought I would have a chance to catch up on the blog in the past few weeks, but boy was I WRONG! May has been crazy!

My family (mom, dad, and two brothers) all came to visit me for 5 days last weekend. While it was great to see everyone, it put me in a tailspin the two weeks prior to their visit as I tried to clean and finish up a million unfinished projects around the house before they got here(which of course means that I have tons of upcoming material for the blog!). But all that frenzied activity has made me tiiiirreed! I woke up cranky this morning and I can't seem to shake it.

So I turned to this little dude, who instantly changes his mood with a little "Dog Days are Over":


I love that he gets all cranky and starts whining until he hears the song start again. Everytime I hear this song, I want to break in to a dance similar to his!

So here is the full version of the song for anyone else that is having a FUNKY Friday! Let's turn it back in to a Feel Good Friday!

Monday, May 9, 2011

Spring has Sprung

While I was away from the blog, I completed a lot of projects. I'm going to try uploading a bunch of them now that we're back and running, but they may seem a little out of order. Since there has been a back log since St. Patrick's Day, I hope you'll stick with me if I seem to jump from here to there!

First up is the centerpiece I created for Spring/Easter. I used things from the Dollar Tree and the Target Dollar Bins to put together this super cute Spring display:

I bought the basket at a thrift store for $1.99 and filled it with floral foam from the Dollar Tree:

I even left it wrapped in the plastic packaging to keep the mess under control (floral foam sometimes tends to fall apart pretty easily when not wet). I used three rectangles for this size basket, cutting one in half to fill the two ends.

I found these cute bird houses in the Target Dollar Bins. They are supposed to be decorative plant stakes for your potted flowers, but they work great for this project! Just stick them right in to the foam:

Along with the floral foam, I also picked up some flowers and birds. These came in a three pack, so you get even more bang for your buck.

After sticking the flowers and birds in the foam, I covered the entire surface with floral moss (bought at Dollar Tree). I didn't glue it down, but it would probably be a good idea if you want to save this for future seasons.

When it's all done, it looks so cute! I put it on my seasonal dresser display in the living room, but it would also be cute as a centerpiece or on a mantle!

I also found this square picket-fence box at the thrift store and used the extra plant stakes to create a second display for my other table. I can't decide which one I like more- the basket or the picket fence! Good thing I can display both!


(P.S. Sorry about the poor picture quality! A new camera is at the top of my wish list!!)

(P.P.S. I don't think these items are available in the Target bins anymore so I'm sorry if I just inspired you to create something that you can't... but just wait until next year! Now as soon as you see them pop up in the bins, you'll already have a plan of what to make!)

Let's Move!

I am a huge fan of the First Lady's new campaign called "Let's Move," which encourages kids to exercise as part of a healthier lifestyle.

The campaign recently had a big boost in popularity when Beyonce wrote and choreographed a song for kids to learn and use as an exercise. Kids in elementary schools across the nation learned the dance and performed it as big groups at school functions. The song is pretty catchy, and the dance is easy enough that anyone can do it! See below:


I think this is a great idea and a fun way to encourage kids to be more active. I always love when celebrities step up and use their popularity for good, too. Way to go, Beyonce!

Here are a couple of links to videos showing the First Lady, Michelle Obama, doing the dance, as well as Beyonce surprising a group of students at their school:

Michelle Obama: http://youtu.be/LHabSqxjsEQ

Beyonce: http://celebrity-gossip.net/beyonce/beyonces-lets-move-school-surprise-502391#ooid=13OW1mMjo3NIOhgXJQeyySIkkFNTtopK

Tuesday, May 3, 2011

I'm Baaaack!

Oh my goodness- I can't believe it's been so loooong! It's hard to believe that March 11 was my last post- not only because, hello??? It's MAY already! But also because- has it really been that long?? Man. Time flies when you're living in chaos! :)

But seriously, between working some big events at work (here and here and here) and my laptop completely crashing in the worst way, I have had such a hard time getting back on here to post!

Let's start with the laptop crash of 2011 (as I will now infamously refer to it). We've been struggling with my poor, old laptop for some time now. I bought it in 2006 when I moved to Texas, so it's a good 5 years old (which is ancient in laptop years). It held on well for me through most of it's lifespan, but it really took a dive there toward the end. It caught a virus that we just couldn't shake, and it was all downhill from there. I was in the middle of some pretty heavy research one night mid-March when it finally decided it had had enough. It locked up and shut down and refused to cooperate. When I took it in to Best Buy's Geek Squad to diagnose the problem, even the "Geek" had to laugh at how bad it really was. (Oh, you want to put in a CD to check the hard drive content? Good luck- this little laptop will spit it right back atcha!) His recommendation: get a new laptop. Awesome.


So a couple of weeks and a nice hefty Best Buy bill later, here I am on my new HP Pavilion Laptop. I love it so far and I can only hope it treats me as well (or better) than my now peaced-out Gateway. Although there is still hope for that old guy- he's back with the Geek Squad now, trying to get made back into a shadow of his former self. If he comes out alive and kicking, the rest of the family will have a computer all to themselves! (and no sharing for me!)

So now that we're back and ready to roll, I've got quite a bit to fill you in on... I've done several projects in the last month that I can't wait to share, and made more decisions about the future of this blog. Being away from the blog for so long showed me how much I really do enjoy writing on here. I may struggle with what to share from time to time, but the important part is that this little space on the blogosphere really gives me the chance to put it all out there! So here's to a refreshed start and some brand-spankin-new content coming your way! Let's go!


(consider this a teaser picture of a future post about our mini-vacation!)